
Welcome to our blog post on DIY Playroom Storage Solutions! If you’re a parent, you know how important it is to have an organized and clutter-free playroom. Not only does it create a safe and inviting space for your little ones to play, but it also makes it easier for them to find and put away their toys.
At Project Neat, our goal is to guide you through the process of planning, building, decorating, and maintaining your playroom storage. From determining your storage needs to teaching your kids to organize, we’ve got you covered. So let’s dive in and create a functional and stylish playroom that your children will love!
Understanding the Importance of Organized Playrooms
A cluttered and disorganized playroom can quickly become a source of frustration for both parents and children. Understanding the importance of an organized playroom is the first step towards creating a functional and enjoyable space for your little ones. Let’s explore the reasons why a well-organized playroom is essential:
1. Safety:
An organized playroom ensures a safer environment for your children. With toys and other items neatly stored away, there is less risk of tripping or falling. It also reduces the chances of small objects being left on the floor, which can pose a choking hazard.
2. Easy Access:
When toys and games are properly organized, children can easily find what they want to play with. This not only saves time but also encourages independent play and fosters creativity.
3. Promotes Learning:
An organized playroom promotes learning and development. By categorizing toys and creating designated spaces for different activities, children can learn about organization, sorting, and categorizing. It also helps them develop problem-solving skills as they figure out where to store items and how to keep their play area tidy.
4. Stress Reduction:
For parents, a clutter-free playroom means less stress. It becomes easier to keep track of toys, clean up, and maintain order in the room. Additionally, an organized playroom creates a calming atmosphere, allowing children to focus and engage in their play without distractions.
5. Encourages Responsibility:
Teaching children to organize their playroom instills a sense of responsibility. By involving them in the process of tidying up and maintaining order, they learn valuable life skills that can carry over into other areas of their lives.
Now that we understand the importance of having an organized playroom, let’s move on to the next section – Planning Your Playroom Storage.
Planning Your Playroom Storage
Before diving into building DIY storage solutions for your playroom, it’s crucial to plan and strategize your storage needs. This section will guide you through the process of planning your playroom storage effectively.
Determining Your Storage Needs
Start by assessing the current state of your playroom. Take inventory of the toys, games, and other items that need to be stored. Consider the different categories of items and their sizes. This will help you determine the types of storage solutions you’ll need.
Ask yourself the following questions:
- What types of toys and items need to be stored? (e.g., stuffed animals, books, art supplies)
- How many toys and items do you have in each category?
- Are there any specific storage requirements for certain items? (e.g., fragile items, bulky toys)
- Do you need additional storage for items like board games or puzzles that have many small pieces?
Sketching Your Playroom Layout
Next, sketch out the layout of your playroom. Take measurements of the available space and consider the existing furniture and fixtures. Determine where you want to place different storage solutions and how they will fit into the overall design of the room.
Consider the following factors:
- The size and dimensions of the playroom
- Existing furniture and fixtures
- Traffic flow and accessibility for children
- Safety considerations (e.g., avoiding sharp corners or heavy items at lower levels)
Choosing the Right Storage Solutions
Based on your playroom storage needs and layout, it’s time to choose the right storage solutions. There are numerous options available, including toy boxes, shelves, bins, and cubbies. Consider the following factors when making your choices:
- Functionality: Does the storage solution provide easy access and organization?
- Durability: Is it made of sturdy materials that can withstand the wear and tear of children?
- Safety: Are there any potential hazards or sharp edges that could harm children?
- Aesthetics: Does the storage solution match the overall design and theme of the playroom?
By carefully considering your storage needs, sketching the layout, and selecting the appropriate storage solutions, you’ll be well-prepared to create an organized and efficient playroom. In the next section, we will explore how to build some popular DIY storage solutions.

DIY Storage Solutions: How to Build
Now that you have a clear plan for your playroom storage, it’s time to roll up your sleeves and dive into building your DIY storage solutions. In this section, we will explore step-by-step instructions for constructing some popular storage options that are both functional and budget-friendly.
Building Toy Boxes
Toy boxes are a fantastic storage solution for keeping toys and games organized. Here’s how you can build your own:
- Measure and Cut: Determine the desired dimensions for your toy box and cut the plywood or medium-density fiberboard (MDF) accordingly.
- Assemble the Box: Using wood screws or nails, attach the sides, front, back, and bottom of the box. Make sure to reinforce the corners for added stability.
- Add Hinges and Lid: Attach hinges to the back of the box and connect the lid. This will allow easy access to the toys while keeping them neatly stored.
- Sand and Paint: Sand the surfaces of the toy box to ensure a smooth finish. Then, apply a coat of child-safe paint or stain to match the desired aesthetic of your playroom.
Creating Wall Shelves
Wall shelves provide a practical and space-saving solution for storing books, small toys, and decorative items. Follow these steps to create your own:
- Measure and Mark: Determine the desired length and height of your shelves. Use a level and pencil to mark the positions on the wall where the shelves will be mounted.
- Install Shelf Brackets: Attach shelf brackets to the wall, ensuring they are level and properly anchored. Make sure to space them evenly to support the weight of the shelves.
- Attach Shelves: Place the shelves on top of the brackets and secure them in place using screws or brackets designed for the specific shelf material.
- Finishing Touches: Sand the shelves to remove any rough edges and apply a coat of paint or stain to match your playroom’s decor.
Constructing Play Tables with Storage
Play tables with built-in storage are not only functional but also provide a designated space for children to play and create. Here’s how you can build one:
- Determine Dimensions: Measure and cut a sturdy tabletop to the desired size. Ensure it is large enough for kids to play comfortably.
- Build the Frame: Construct a frame using wood or plywood, ensuring it is slightly smaller than the tabletop. Attach legs to the frame for stability.
- Add Storage Compartments: Attach storage compartments to the sides or underneath the tabletop. These can be built-in drawers, cubbies, or bins to hold toys, art supplies, or games.
- Sand and Finish: Sand all surfaces of the play table to remove any rough edges. Apply a child-safe finish or paint to protect the wood and add a touch of color.
By following these instructions, you’ll be able to build toy boxes, wall shelves, and play tables with storage to meet your playroom’s specific needs. In the next section, we will explore how to decorate and personalize your storage solutions.
Decorating and Personalizing Your Storage
Once you have built your DIY storage solutions, it’s time to add some decorative touches and personalize them to make your playroom truly unique. In this section, we will explore various ways to decorate and personalize your storage solutions.
Choosing a Color Scheme
Consider selecting a color scheme that complements the overall theme of your playroom. You can choose vibrant and playful colors to create a fun atmosphere or opt for a more calming and neutral palette. Paint your storage solutions in coordinating colors or use patterned contact paper to add a pop of color and pattern to shelves or drawers.
Adding Labels for Easy Identification
Labels are a practical and visually appealing way to help your children identify where toys and items belong. You can create labels using adhesive labels, chalkboard paint, or even vinyl lettering. Make sure to use clear and concise labels that are easy for your children to read and understand. This will encourage them to put things back in their designated spots.
Personalizing with Kids’ Artworks
Get your children involved in the decorating process by incorporating their artworks into the playroom storage. Frame their masterpieces and hang them on the walls near the storage solutions. You can also use their artwork to create custom drawer pulls or knobs. This not only adds a personal touch but also showcases your children’s creativity.
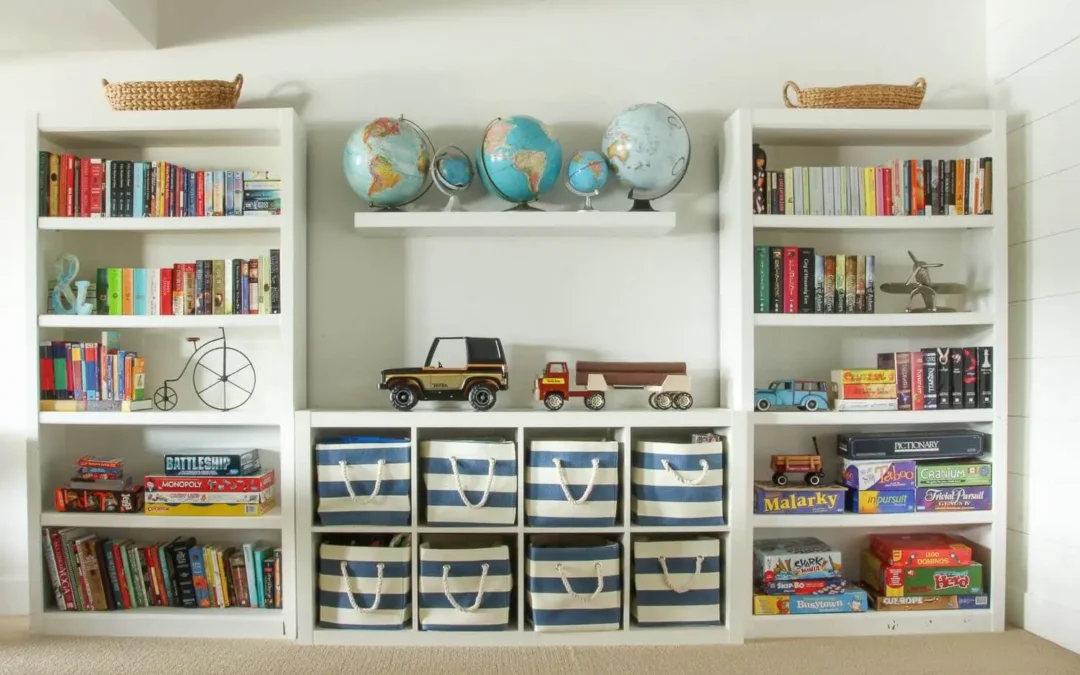
Adding Decorative Baskets or Bins
To enhance the aesthetic appeal of your storage solutions, incorporate decorative baskets or bins. Choose options that match the overall theme and color scheme of the playroom. These can be used to store smaller toys, art supplies, or miscellaneous items. Woven baskets, fabric bins, or colorful plastic containers can all add a touch of style to your playroom storage.
Incorporating Wall Decals or Murals
Consider adding wall decals or murals to create a visually engaging backdrop for your storage solutions. Wall decals featuring playful characters, shapes, or educational themes can liven up the playroom and make it more inviting. Alternatively, you can paint a mural directly on the wall, incorporating elements that resonate with your children’s interests or hobbies.
By decorating and personalizing your storage solutions, you can transform them into not only functional but also visually appealing elements of your playroom. In the next section, we will discuss how to maintain and keep your playroom organized for the long term.
Maintaining and Keeping Your Playroom Organized
Congratulations on creating a beautifully organized playroom! However, the work doesn’t stop there. In this final section, we will discuss some essential tips for maintaining and keeping your playroom organized for the long term.
Regular Cleaning and Decluttering
Schedule regular cleaning sessions to keep your playroom tidy. Set aside time each week to remove any clutter, wipe down surfaces, and vacuum or sweep the floor. Encourage your children to participate in the cleaning process, teaching them the importance of maintaining an organized space.
Teaching Kids to Organize
Instill good organizational habits in your children by teaching them how to clean up after themselves. Provide clear instructions on where items should be stored and encourage them to return toys and games to their designated places after playtime. Make organizing a fun activity by turning it into a game or challenge.
Regularly Updating Storage as Kids Grow
As your children grow, their interests and toy collections may change. Regularly assess and update your storage solutions to accommodate their evolving needs. Consider donating or selling toys that are no longer used and make space for new items that align with their current interests.

Creating Rotating Toy Systems
To prevent toys from becoming overwhelming and to maintain a sense of novelty, consider implementing a rotating toy system. Store some toys out of sight and periodically switch them with the toys currently in use. This helps to keep the playroom fresh and exciting while reducing clutter.
Utilizing Labels and Organizational Systems
Continue to utilize labels and organizational systems to keep everything in order. Regularly check labels to ensure they are still accurate and update them as needed. Use clear bins or containers to store items, making it easier for both you and your children to identify and access what you need.
By implementing these maintenance strategies, you can ensure that your playroom remains organized, functional, and enjoyable for your children. Remember, consistency and involvement from both parents and children are key to maintaining an organized playroom in the long run.
We hope that this comprehensive guide on DIY playroom storage solutions has provided you with valuable insights and inspiration. By following the steps outlined in this blog post, you’ll be well on your way to creating a playroom that is not only organized but also a delightful space for imagination, creativity, and fun! If you need help with your playroom organization project, Project Neat is only a phone call away. For more DIY playroom storage solutions, contact Project Neat today!